Accessibility is important to make your content available for everyone. On this page you will find the shortcuts to navigate through the platform and will provide you with some tools to make your own content more accessible. Please note that the Firefox browser does not offer the best accessibility support for this website.
At this moment Kaltura complies with accessibility guidelines such as WCAG 2.1 AA. If you cannot find your answer on this page, please contact us via the contact form, or read more about Kaltura's accessibility Statment on their website.
MAKE YOUR CONTENT MORE ACCESSIBLE
How do I switch to high contrast mode?
HIGH CONTRAST MODE AT VIDEO.UVA.NL
You can enable high-contrast mode on video.uva.nl by clicking the profile icon next to the search box.

HIGH CONTRAST MODE IN CANVAS
In Canvas, you can enable high-contrast mode by clicking the three dots next to the +Create button within My Media.
Why should I add transcriptions or subtitles to my media?
How do I generate transcriptions for my video?
- Go to My Media on video.uva.nl or in Canvas.
- Open the desired video.
- Click the three dots below the video, then select Captions & enrich.

- Set the Source media language to the preferred language.

- Click on Order.
A transcription of your media will be made with an accuracy of approximately 95%, depending on the audio quality and accent. After the subtitles have been delivered, the requester or co-editor can further refine them manually if needed or modify them into subtitles using the available editor. Once your transcription is generated, you can edit them or transform them into subtitles. For instructions see How do I edit generated transcriptions?
How do I edit generated transcriptions?
-
-
- Click on the Three dots menu button below the video, followed by Edit.
- Click on the Accessibility tab and locate your generated transcription file.
- Click the three dots and select Launch editor.
In this editor there are several components you can edit:
Edit detail
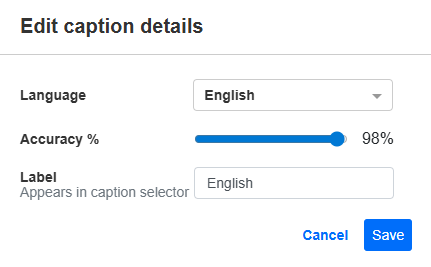
- In the editor, click Edit details to set the caption's language, accuracy and label.
The 'Edit caption details' window opens. - Update the caption's language, accuracy, and label.
- Click Save.
Changes are applied immediately.
Find and replace text
- In the editor, click Replace.
- Enter the search term in the Find match field.
- Enter the replacement term in the Replace with field.
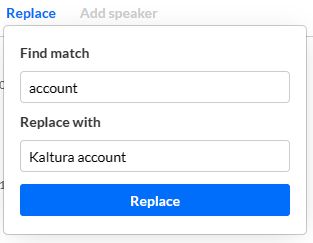
- Click Replace.
- Click Save.
Add speaker name
- In the editor, select the row(s) where you want to add the speakers, then click Add speaker.
- In the Speaker name field, type the name.
- Click Add Speaker.
The name is added to the selected captions.
- Click Save.
The information is immediately updated.
Edit a caption line
- Click a caption line.
- Update the text as needed.
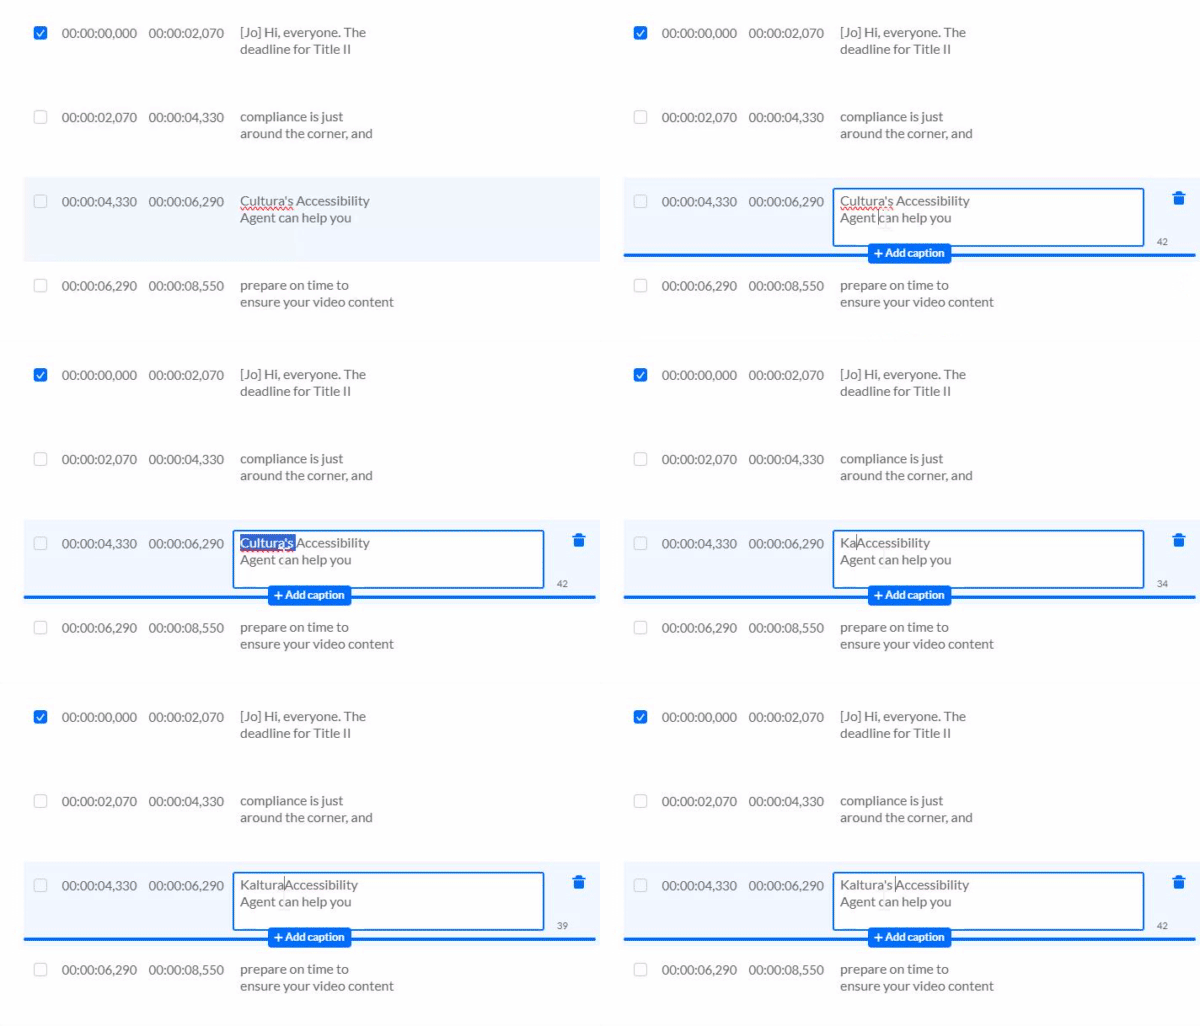
- Click Save.
The information is immediately updated.
Revert or save changes
- Revert restores the last saved version.
- Save applies your changes.
- Click on the Three dots menu button below the video, followed by Edit.
-
Why should I add an Extended Audio Description (EAD) to my media?
It is possible to add Extended Audio Description (EAD) to media. This feature makes videos more accessible for viewers with visual impairments. Extended Audio Description is an additional spoken narration that describes what is happening visually in a video, such as actions, facial expressions, or important elements within a scene. As a result, viewers who are partially sighted or blind can better follow and understand the content.
When a video contains an Extended Audio Description, viewers can easily activate it via the AD button in the video player.
Once enabled, the additional description will automatically play at the appropriate moments. Watch the video below to see an example:
How do I create an Extended Audio Description (EAD)?
An EAD file is created in VTT format (WebVTT). This is a simple text file in which you describe what is visually happening in the video, linked to specific timestamps. You can create this file using a standard text editor, such as Notepad (Windows) or TextEdit (Mac), and save it with the .vtt extension. See an example below:
WEBVTT

00:00:05.000 --> 00:00:09.000
Een vrouw gaat aan een tafel zitten en pakt een schrift.

00:00:12.000 --> 00:00:16.000
Ze opent het schrift. Een man komt binnenlopen.

00:00:20.000 --> 00:00:24.000
De man gaat naast de vrouw zitten.- To upload your VTT file, go to the desired media and click the three dots below the video, followed by Edit.
- Click on the Accessibility tab.
- Go to Captions & Extended Audio Description (EAD) and click Upload
- Choose Extended Audio Description (EAD).
The 'Upload Extended Audio Description (EAD) will load. - Upload your .vtt file by clicking Upload
- Give your EAD a label. This label will appear in the player when the viewer wants to select the EAD.
- Set your language.
- Define the accuracy.
- Click Add.
KALTURA SHORTCUTS
Shortcuts within the Kaltura player
Shortcuts video editing
The shortcuts below are for when you are working in the Kaltura editor to cut your video, make a quiz or create hotspots. You can also open the shortcuts within the editor to go the help icon (?) at the bottom of left-hand toolbar.
| Action | Windows | macOS |
|---|---|---|
| Save | Ctrl + s | Cmd + s |
| Save a copy | Ctrl + Shift + s | Cmd + Shift + s |
| Undo | Ctrl + z | Cmd + z |
| Redo | Ctrl + Shift + z | Cmd + Shift + z |
| Go to user manual | m | m |
| Open/close panel | Ctrl + Shift + 1 | Cmd + Shift + 1 |
| Help | Ctrl + y | Cmd + y |
| Show tooltips | t | t |
| Delete segment | Delete / Backspace | Delete / Backspace |
| Split segment | s | s |
| Select next segment | Shift + → | Shift + → |
| Select previous segment | Shift + ← | Shift + ← |
| Zoom in the timeline | Alt + = | Option + = |
| Zoom out the timeline | Alt + - | Option + - |
| Set in point | i | i |
| Set out point | o | o |
| Reset | Alt + Shift + r | Option + Shift + r |
| Toggle play / pause | Spacebar | Spacebar |
| Jump to start of selected range | Alt + Shift + ← | Option + Shift + ← |
| Jump to end of selected range | Alt + Shift + → | Option + Shift + → |
| Jump forward by one second | → | → |
| Jump forward by ten seconds | Alt + → | Option + → |
| Jump backward by one second | ← | ← |
| Jump backward by ten seconds | Alt + ← | Option + ← |
| Go to time | Ctrl + j | Cmd + j |
Shortcuts Kaltura Capture
Kaltura Capture is an external app to record your videos with. You can launch Kaltura Capture from the platform but it will open in a new window. In the table you will find the shortcuts for Kaltura Capture.
- On Mac, use the Command (⌘) key.
- On Windows, use the Control (Ctrl) key.
| Shortcut | Action |
| ⌘/Ctrl + Shift + R | Start / Pause / Resume Recording |
| ⌘/Ctrl + Shift + S | Stop Recording |
| ⌘/Ctrl + Shift +C | Cancel Recording |
| ⌘/Ctrl + Shift +E | Clear all Notifications |
| ⌘/Ctrl + Shift +M | Go to Management |